Rescuing a watercolour that’s gone adrift

I’m afraid things have been quiet on the blogging front lately as I’ve been in the Canadian Rockies for the past few weeks, painting some truly stunning scenery, and this will be the subject of a forthcoming blog.

This post covers the tricky subject of how you rescue watercolours that have gone slightly awry, or perhaps have somehow spectacularly misfired. It happens to us all. Many folk think you have to tear up the wayward masterpiece, but many watercolours can be effectively rescued even when they appear to be something of a disaster. I’ve just produced a DVD on the subject, and this covers a whole variety of techniques you can use to put things right, or simply alter a composition where you feel the need for change.

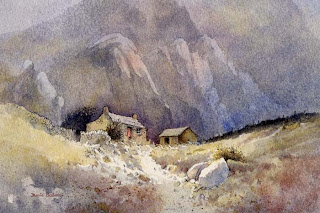
Mountain Bothy

On the left you see one of my old watercolours that I discarded years ago as I didn’t like the finished treatment: the peaks were too repetitive, the edges too hard, and the atmosphere didn’t really convince me. I felt I’d made a mess of it. When I was persuaded to do a rescues DVD I thought this would be a good lesson for illustrating methods of changing a scene.

Unlike a recent painting, over time it becomes more difficult to sponge out details and passages, but I have the advantage that most of my watercolours are carried out on Saunders Waterford paper, one of the most robust watercolour papers on the market, so I could really work hard into the paper. I also rarely use the manufacturers’ greens, preferring to mix my own, which are less staining and therefore easier to remove. Because of the hard-edged striking shapes of the peaks in this painting I realised that I would have to completely change the format to a landscape one and not include those strident peaks.

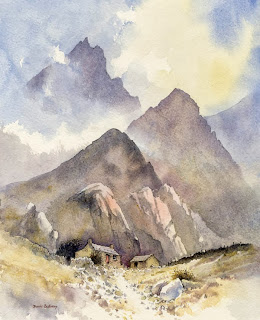
Mountain Bothy 2

My first task was to reduce the background by heavy sponging with plenty of clean water, then subduing it further with a transparent glaze of French ultramarine and a little cadmium red. This had the effect of creating a misty distance, cooler in temperature. By placing some shadow across the foreground it emphasised a lighter patch in front of the bothy, and while this was still wet I dropped in some Indian red to warm up the immediate foreground. Thus, the cool background and warm foreground suggested greater space and distance, and the buildings stand out more.

Copies of the Rescue Watercolours DVD, available for the first time this month, are available from my website  If you have any old watercolours lying around that haven’t quite worked, or have encountered a mistake you’d like to rectify, then there are many techniques on the DVD which will help improve your work. Some of the techniques are also useful to employ as a deliberate method to create special effects. There is nothing worse than finishing a watercolour only to find there is a niggling little problem to which your eye is drawn time and time again, when in fact there are almost certainly ways of solving the issue.

Using counterchange to good effect

With the current heatwave hitting the British Isles I reckon it’s rather nice to remind ourselves of those lovely cooling days of English drizzle. I’ve been working on sunny landscapes recently and will feature some in future blogs, but for the moment I’d like to discuss counterchange, an interesting feature that someone brought up recently.

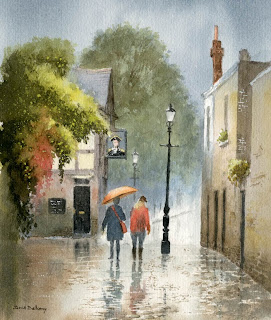
Hackney

Counterchange in a landscape scene is a very effective way of adding interest to a passage or solving a tonal problem. At its simplest it could be a change in tone across a ridge, hill, forest, mountain, or any background mass to create a tonal range running from light on one side to dark on the other, while at the same time adjusting the sky in a similar way so that the dark part of the sky stands against the light part of the hill, and vice versa. In this watercolour of a cobbled street in Hackney you can see I’ve used the method vertically on the right-hand wall just to the right of the lampost.

In this instance I’ve included it for interest rather than to solve a problem. Where the method is extremely useful in solving a tonal problem can be, for example, where you have a house with a light-coloured wall set against a dark background: if the roof is dark it will get lost in the dark background, and if it is light it will lose itself against the light wall. By laying a graduated wash over the roof, darker at the bottom and graduating to a lighter top where the roof abuts the darker background, you can thus make both top and bottom of the roof stand out, thus causing a counterchange effect using the graduated wash. One of the most simple examples of counterchange can often be found on telegraph poles or winter tree-trunks where they show up light against dark vegetation at the bottom, and dark against the bright sky at the top, depending on the light of course.

This particular painting is featured in my Skies, Light & Atmosphere book available on my website with a special offer package of book and DVD, available only from the site or my demonstrations. Don’t forget to watch out for these effects in the natural landscape when you are out and about. You can learn a lot even without your painting or sketching gear!

Creating a strikingly moody landscape in watercolour

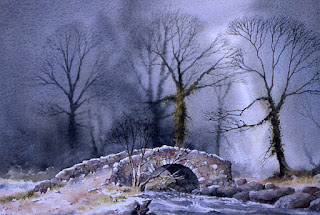
The combination of a striking centre of interest with a soft, misty background can be a powerful recipe for a stunning composition. To achieve this is it hard to beat the combination of masking fluid and the wet-into-wet watercolour technique. In producing a strong contrast between the soft, ethereal misty background and the hard-edged focal point you will be creating a really head-turning image.

Hisley bridgeThis watercolour of Hisley Bridge on the edge of Dartmoor illustrates the effectiveness of painting masking fluid over the bridge before doing any painting, then applying very fluid washes wet-into-wet for the background, bringing the wash down over the bridge with impunity, as you can lift off the masking fluid once it has dried and hey presto! the bridge appears again. The sense of mood has been accentuated by limiting the background colours in the wet-into-wet wash, with warmer colours being applied in the bridge and foreground.
  If you are interested in this particular scene there is a stage-by-stage demonstration of the painting in my book Painting Wild Landscapes in Watercolour, published by HarperCollins, and for more information see my website.
On Friday 7th June I shall be demonstrating at Patchings Art & Craft Festival, in the St Cuthberts Mill marquee at 11am, and the Search Press marquee at 3pm, then again on Saturday morning at 11 am in the St Cuthberts Mill marquee. On each occasion I’ll be using the marvellous Saunders Waterford High White paper manufactured by St Cuthberts Mill, with whom I’ve worked for a great many years now. You can take it from me that when you are demonstrating you have to have total faith in the paper, and Waterford has never let me down.
Sadly Jenny won’t be at Patchings this time as she has not been well. It’s a great disappointment  as she loves demonstrating at the festival, but hopefully she’ll be back in action at next year’s event.

A bump in the road

Every now and again our plans are thrown off course and we have to adapt to the new circumstances. In April I suffered one such ‘bump in the road’,  a slipped disc and I ended up in hospital. At the same time I was given the news that I need a major operation for an unrelated issue this summer so I have had to cancel all my demonstrations and events for the foreseeable future. I am sorry if any of these cancellations have affected you. I may not be accompanying David at his events either and will miss seeing old and new friends. but I hope to be back on course again by the autumn.

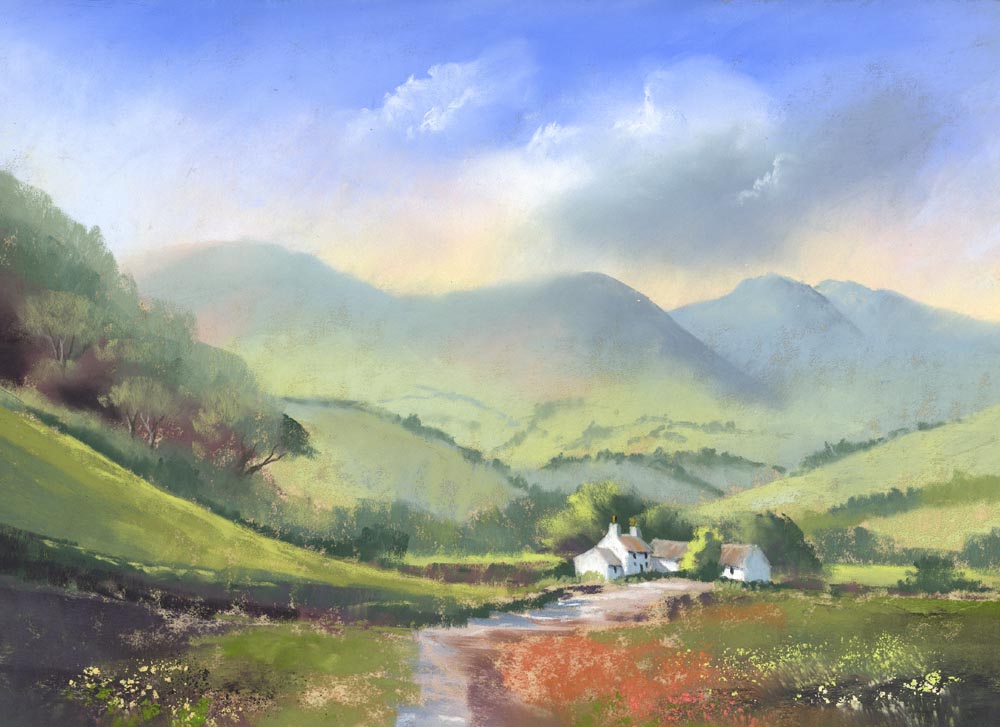
The pastel painting below was the last demonstration I did this year, for Llantarnam Grange Art Group in Cwmbran in March. The theme was ‘creating atmosphere’ and pastel is the ideal medium for this purpose. Softening the edges of the distant features in order to create a sense of atmosphere is relatively simple with pastel. To create this effect of clouds over the hilltops, just gently stroke some of the sky colour down over the distant hills. This pushes them into the distance.

Crickadarn

Crickadarn, Mid Wales, Pastel by Jenny Keal

The same method was used lower down in the distant hills, softening the green colour of the lower slopes into the blue/grey. This softness is emphasized by making the edges of the focal point sharper and the tones darker. All these techniques help to create the illusion of recession in a painting.

You can see this technique and many others, demonstrated in live action on my DVD, Painting with Pastels, available in our online shop.

I hope you find time to get out in the countryside this summer to paint and sketch and store up subjects for the coming winter months. Nature has a way of invigorating and at the same time restoring tranquility in our busy lives.

Painting foliage in summer

I recently ran a course in the Welsh lake district – the Elan Valley reservoirs, where there are many marvellous subjects to paint, including glorious river scenery. With this rather cold spring weather it was important to find locations where students could work out of doors in reasonable comfort, and as there are many sheltered spots in the Elan Valley area we were able to work quite happily.

River Elan sm

River Elan

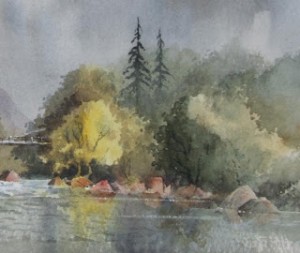
The picture shows a part of a watercolour of the River Elan which I did a few years ago on site. It’s a fairly rough watercolour, as I painted it while standing the middle of the river, using an easel. This was the optimum spot, and as it was painted to support the John Muir Trust, the Scottish-based charity that fights for the wild land of Britain, a photographer came along to record the event. Alas, after taking a few shots he fell into the river, but his camera was OK and all he got was a bit of a wetting.

Although it was mid-summer, I haven’t used many greens in the painting, much of the foliage achieved with a deliberately dull blue-grey, created by mixing French ultramarine and yellow ochre, a rather opaque colour. This dullness helps to accentuate the bright yellow tree. With foliage, edges get lost easily, as they run into one another, and you can see how I’ve introduced light edges of foliage by painting the darker washes around the edge. It pays to look at the scene through half-closed eyes as this will eliminate much detail and allow you to pick out the more important aspects of the scene, both in terms of tone and detail. Please don’t try jumping into rivers to get your paintings done – not only can it be costly in lost equipment, but it can also be rather dangerous in the wrong place!